4.1 Getting Started
With a Burst SMS account, you can:
- Schedule and send SMS campaigns
- Obtain a dedicated virtual number
- Track results of your SMS campaigns
- Automate SMS campaigns using keyword functions
To create an account:
- Visit the Burst SMS registration page
- Select your country, and press “Start Trial”
- Fill out the form and click ‘Create Account’ to start your trial
- Activate your account with the SMS verification code you receive
Once you’ve logged in, you should see something like this:
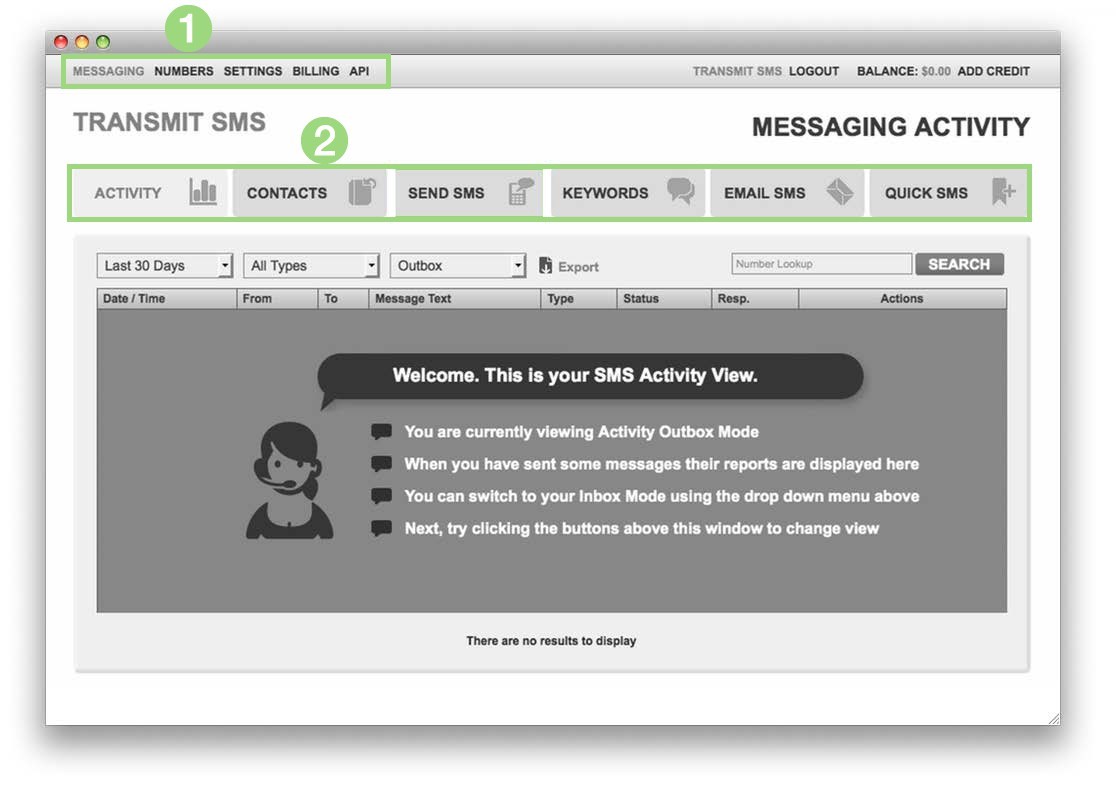
Main Navigation Menu
- Messaging: This is where you’ll be spending most of your time. Add contacts, review past campaigns, send new campaigns, set up keywords, activate email to SMS and other functions, and access quick SMS
- Numbers: Purchase and manage dedicated virtual numbers or shortcodes (depending on your country)
- Settings: Manage your profile, change your email address, add new users to the account, find your API key and set up your API secret
- Billing: Add new billing information, add new credit, setup auto-recharge, and review previous transactions
- API: If you’re a developer, this is where you can find our SMS API Documentation
Messaging Navigation Menu
- Activity: Review previous campaign reports
- Contacts: Create new lists, add individual contacts, or upload a list
- Send SMS: Select a contact list, compose a message, and send the campaign
- Keywords: Create keywords functions that add contacts to new lists and other custom features
- Email SMS: Send and receive SMS using your own email address
- Quick SMS: Send SMS without having to log in
4.2 How to add individual contacts to Burst SMS
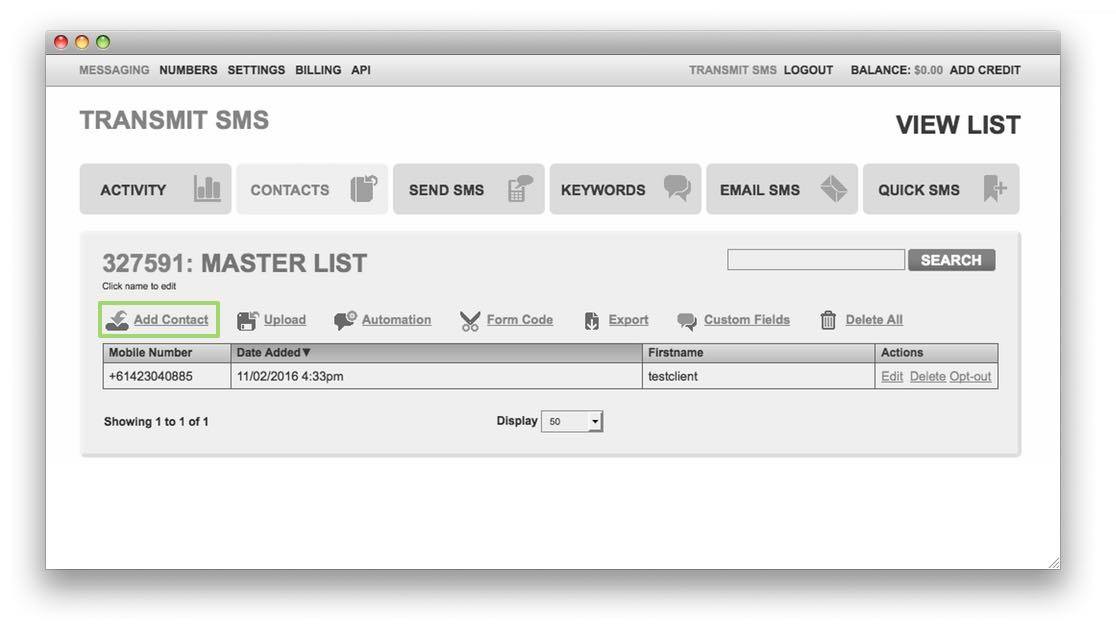
Click on the Contacts tab and select My Test List.

Click on Add Contact. (Please note that we’ve renamed My Test List to Master List).
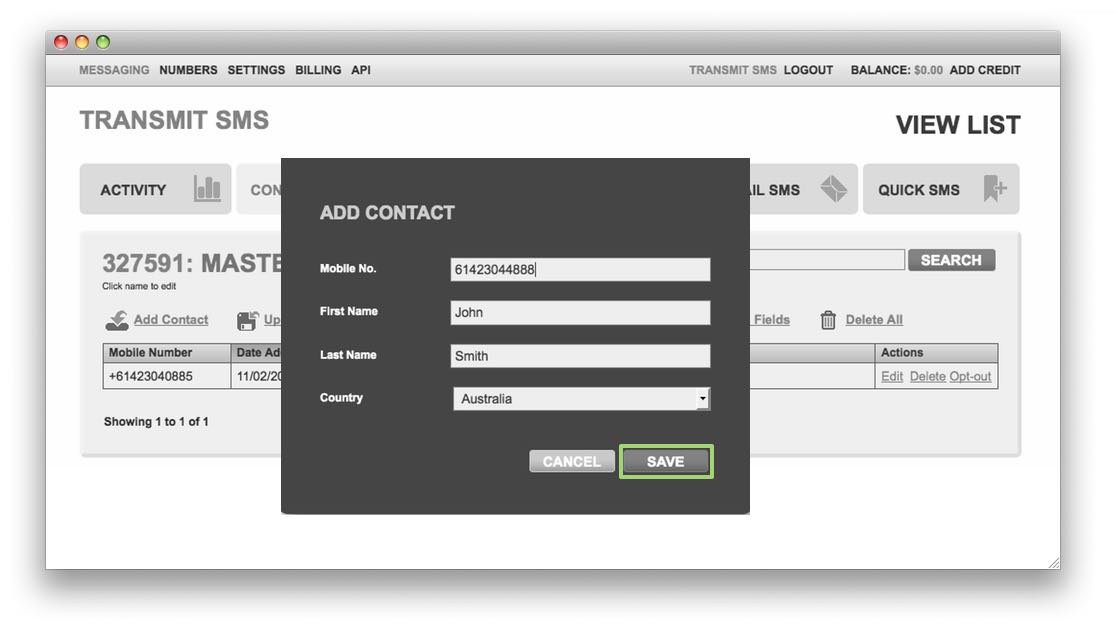
Add the contact information and click Save.
4.3 How to add a list of contacts to Burst SMS
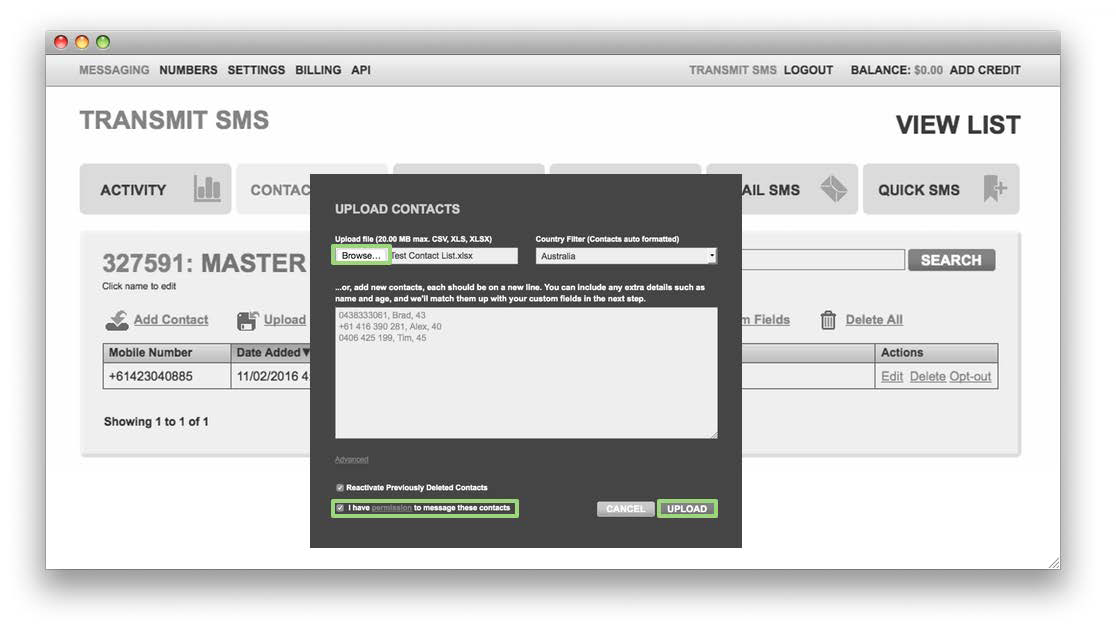
Click on the Contacts tab and select My Test List.

Click on Upload. (Please note that we’ve renamed My Test List to Master List).

Click on Browse. Find your file and select ‘I have permission to message these contacts’ and then click Upload.
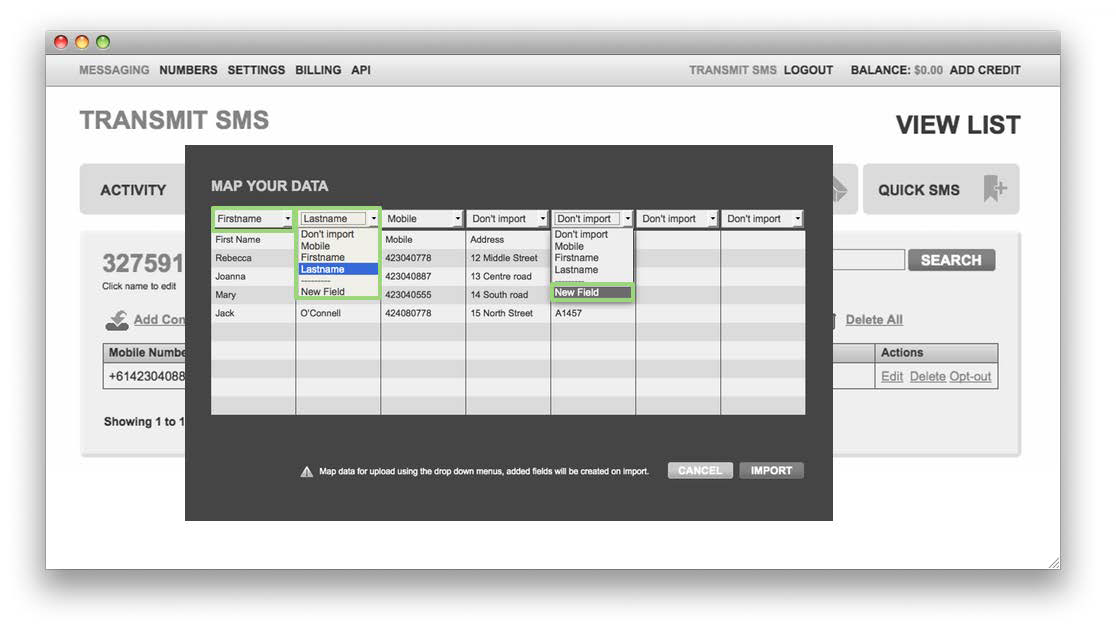
Preview your list and make sure to map your columns correctly. If you’re happy, then click Import.
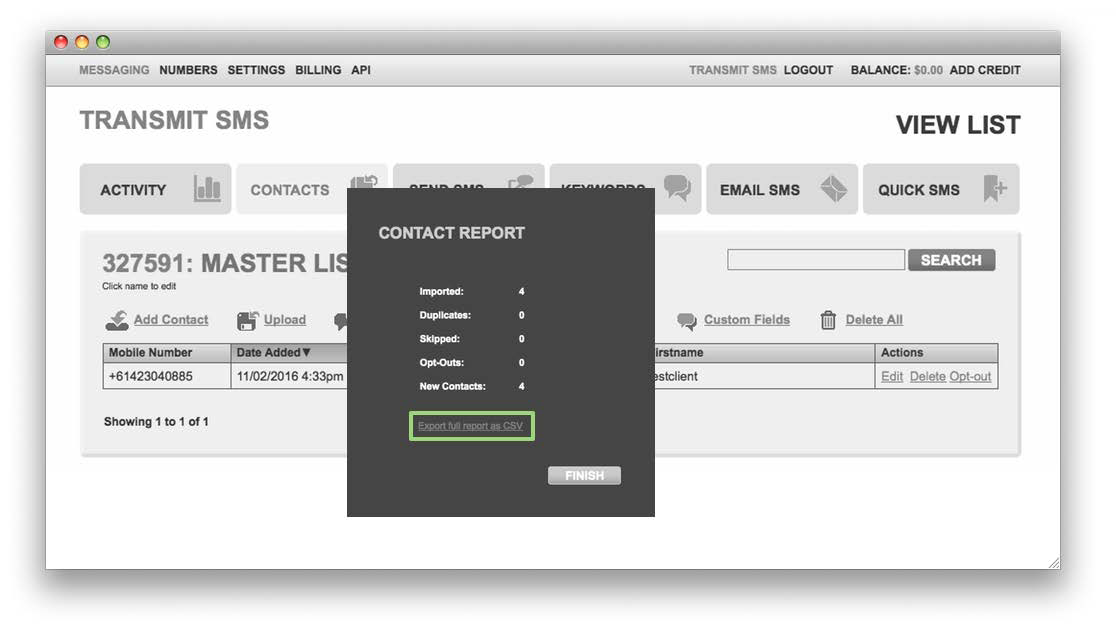
You’re welcome to click on ‘Export full report as CSV’ to check if your list imported correctly.
And that’s it! Feel free to spend some time reviewing the rest of the platform. If you have any questions, please contact us by submitting a ticket or clicking the chat button on the bottom right.